
Introduction
There is something magical about cracking an egg into a hot pan and watching the white turn crisp at the edges while the yolk stays golden and soft. That is the joy of sunny side up eggs. If you have ever ordered them at a diner and wondered why yours never look quite the same at home, you are not alone.
Sunny side up eggs look fancy, but they are actually one of the simplest breakfast dishes you can make. You just need the right heat, the right timing, and a little patience. In this article, we will walk through everything you need to know, from what makes these eggs unique to how you can cook them perfectly every single time.
By the end, you will understand the difference between sunny side up and other egg styles, how long they take to cook, whether they are safe to eat, and the small mistakes that ruin most attempts. We will also share a quick recipe and answer the questions people ask most often.
What Are Sunny Side Up Eggs?
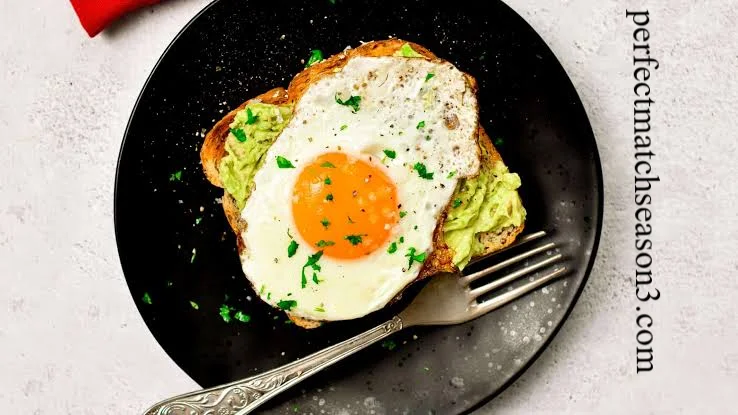
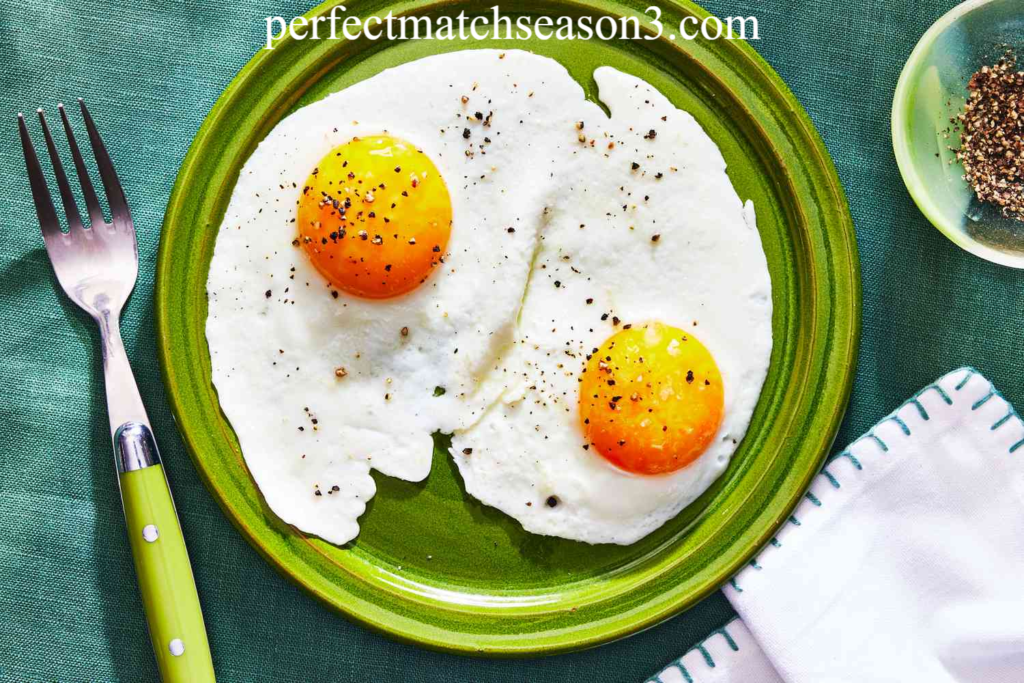
Sunny side up eggs are fried eggs cooked on one side only. The egg is cracked into a pan and left to cook without flipping. The white sets completely while the yolk stays runny and bright, looking like a little sun sitting on a plate. That is exactly where the name comes from.
Unlike scrambled eggs, sunny side up eggs keep their shape. The yolk remains whole and unbroken unless you choose to break it yourself. This style highlights the egg in its purest form, with a soft yolk, tender white, and slightly crisp edges if you like them that way.
People love sunny side up eggs because they are quick, protein rich, and pair well with almost anything. Toast, avocado, rice, or a full breakfast plate all work beautifully with this style of egg.
How Do You Cook Sunny Side Up Eggs?
Cooking sunny side up eggs is simple once you know the steps. Here is a clear method you can follow every morning.
- Crack a fresh egg into a small bowl or cup first. This helps you avoid shell pieces and lets you slide the egg gently into the pan.
- Heat a non stick pan on low to medium heat. Add butter or oil and let it melt without smoking.
- Slide the egg into the pan carefully.
- Let it cook undisturbed. Do not touch or flip it.
- Cover the pan with a lid for the last minute if you want the top of the white to set without flipping.
- Remove the egg once the white is fully cooked and the yolk still jiggles slightly.
That is it. The secret lies in patience and controlling your heat. Rushing with high heat will burn the bottom before the top sets properly.
Pan Temperature Matters
Low to medium heat is the sweet spot for sunny side up eggs. High heat cooks the bottom too fast and leaves the top raw. Low heat keeps the white soft, the edges lightly golden, and the yolk perfectly runny.
Butter or Oil, Which One?
Butter gives a rich flavor and helps with light browning on the edges. Oil, such as light olive oil or avocado oil, handles higher heat better and gives a cleaner taste. Many home cooks use a mix of both for the best flavor and texture.
What Is the Difference Between Sunny Side Up and Over Easy Eggs?
This is one of the most common questions people ask about egg styles, and the answer is simple.
Sunny side up eggs are cooked only on one side. The yolk is never touched, and the egg is never flipped.
Over easy eggs are flipped briefly to cook the white on top as well, but the yolk stays runny. Over medium eggs are flipped and cooked a bit longer, so the yolk becomes slightly thickened but still soft. Scrambled eggs are mixed and stirred continuously, breaking the yolk and white together into soft curds.
If you love a fully intact yolk with a soft top, sunny side up eggs are your best choice. If you prefer both sides cooked while keeping a runny center, over easy is the way to go.
Source thekitchn.com
How Long Does It Take to Cook Sunny Side Up Eggs?
Sunny side up eggs usually take about three to five minutes to cook completely. The exact time depends on your stove, pan, and how soft you like the yolk.
Here is a simple breakdown.
- Very soft yolk with barely set white: around three minutes
- Classic sunny side up with a fully set white and runny yolk: four minutes
- Slightly firmer white with a soft yolk: five minutes
Covering the pan for the last minute speeds up the process because the trapped steam helps cook the top of the egg without flipping it.
Are Sunny Side Up Eggs Safe to Eat?
This question comes up often, and it deserves a clear answer. Sunny side up eggs are generally safe to eat when you use fresh, properly handled eggs and cook them until the white is fully set.
The main concern with any egg dish involving a runny yolk is the small risk of salmonella. According to the USDA, eggs should be handled and stored properly to reduce this risk. Here are a few safety tips.
- Always use eggs that are stored in the refrigerator and within their expiry date.
- Avoid eggs with cracked shells.
- Cook the white completely, even if the yolk stays soft.
- Use pasteurized eggs if you are pregnant, elderly, very young, or have a weak immune system.
If you follow these basic steps, sunny side up eggs are a safe and delicious way to enjoy eggs at home.
What Are the Best Tips for Perfect Sunny Side Up Eggs?
After years of making eggs for breakfast, I have picked up a few tricks that make a real difference. Here are the best tips for getting sunny side up eggs right every time.
- Use fresh eggs. Fresh eggs hold their shape better and give you a neater yolk.
- Keep the heat low to medium. This is the single biggest factor in avoiding burnt edges and undercooked tops.
- Add a splash of water and cover the pan. This steams the top gently without flipping.
- Use a non stick pan. It prevents sticking and helps you slide the egg out cleanly.
- Season after cooking, not before. Salt added too early can toughen the white slightly.
- Let the egg sit at room temperature for a few minutes before cooking. Cold eggs straight from the fridge can cook unevenly.
Small adjustments like these are what separate a good sunny side up egg from a great one.
Quick Recipe: Perfect Sunny Side Up Eggs
Ingredients
- 2 fresh eggs
- 1 teaspoon butter or oil
- Salt and pepper to taste
- A splash of water, optional
Instructions
- Heat a non stick pan on low to medium heat.
- Add butter and let it melt gently.
- Crack each egg into the pan carefully.
- Cook for two to three minutes until the edges turn white.
- Add a splash of water and cover the pan for one more minute if you want the top fully set.
- Remove from heat, season with salt and pepper, and serve immediately.
This method gives you sunny side up eggs with a soft, runny yolk and a tender white every time.
Nutrition, Taste, and Texture
Sunny side up eggs offer a wonderful mix of protein, healthy fats, and essential vitamins like B12 and choline. A single large egg provides around six grams of protein and only about seventy calories, making it a filling yet light breakfast choice.
Texture wise, this style gives you the best of both worlds. The white is tender, sometimes slightly crisp at the edges, while the yolk stays smooth and rich. When you cut into it, the yolk flows out and adds natural creaminess to whatever you are serving it with.
Common Mistakes and How to Avoid Them
Many people struggle with sunny side up eggs without realizing what is going wrong. Here are the most common mistakes.
- Cooking on high heat, which burns the bottom before the top sets.
- Using old eggs, which spread out too thin and lose their shape.
- Skipping the lid, which leaves the top of the egg raw.
- Flipping the egg by accident, which turns it into an over easy egg instead.
- Adding salt too early, which can make the white slightly rubbery.
Avoiding these small mistakes instantly improves your results.
Serving Ideas for Breakfast and Brunch
Sunny side up eggs pair well with almost any meal. Here are a few serving ideas to try.
- Place the egg over buttered toast for a classic breakfast.
- Serve it on top of fried rice for a comforting brunch bowl.
- Add it to a breakfast burrito with beans and cheese.
- Pair it with avocado slices and whole grain bread.
- Serve alongside crispy bacon and roasted tomatoes for a full plate.
The soft yolk works as a natural sauce, making almost any dish taste richer.
Final Thoughts
Sunny side up eggs are simple, quick, and endlessly satisfying once you understand the basics. With the right pan temperature, fresh eggs, and a little patience, you can make restaurant style sunny side up eggs right in your own kitchen. Try the recipe above tomorrow morning and see how easy it really is. Do you prefer your sunny side up eggs with a soft yolk or a firmer one? Give this method a try and share your results with friends and family who love a good breakfast.
FAQs
1. What are sunny side up eggs? Sunny side up eggs are fried eggs cooked on one side only, with a fully set white and a soft, runny yolk on top.
2. How long does it take to cook sunny side up eggs? It usually takes three to five minutes, depending on how soft or firm you like the yolk.
3. Are sunny side up eggs safe to eat? Yes, as long as you use fresh eggs and cook the white fully. People with weaker immune systems should consider pasteurized eggs.
4. What is the difference between sunny side up and over easy eggs? Sunny side up eggs are never flipped, while over easy eggs are flipped briefly to cook both sides while keeping the yolk runny.
5. Can I make sunny side up eggs without butter? Yes, you can use oil instead. Light olive oil or avocado oil work very well.
6. Why does my egg white stay runny on top? This happens when the pan is not covered. Adding a lid for the last minute helps the top cook evenly.
7. Can I cook sunny side up eggs on high heat to save time? It is not recommended. High heat burns the bottom before the top sets properly.
8. What is the healthiest way to cook sunny side up eggs? Using a small amount of healthy oil like olive oil and cooking on low to medium heat keeps the dish light and nutritious.
perfectmatchseason3.com
Email: johanharwen314@gmail.com
Author Name: Hamid Ali
Author Bio: Hamid Ali is a home cooking enthusiast and food writer who loves turning simple kitchen basics into easy, everyday wins. With years of experience testing breakfast recipes at home, she enjoys sharing practical tips that make cooking feel less like a chore and more like a small daily joy.